My Yummy Pantry Essentials

(((blush))) I have news! At first, I wasn’t sure if I was going to post this (shuffle, shuffle), but if there is anyone I would like to share this bit news with, it is the good people who actually visit my little corner of the cyber-world. So here goes: this month, your’s truly is part of a feature in Yummy Magazine on pantry essentials! Yes, me and four other food lovers (just us regular people that love to cook) share what we (have been hiding) think is important to have in stock.

Yummy is a relatively new food magazine; this is only its fourth issue. So far, I have been happy with what I find between its covers. It has a fresh and contemporary vibe that I like, clean and hip food styling, and smart features.

So if you'd like to see what I like to hide in my larder, you can grab a copy at the newsstand. If not, there are lots of other interesting things to peruse. I know I’m going to be checking out:

  • The shopping guide to our urban markets and specialty stores
  • The gourmet take on bangus (milkfish) by fellow foodblogger Anne of Eat Bagnus (I love bangus!)
  • The grilled tuna belly recipe
  • “Your Budget, Chef’s Recipe” – Top local chefs prepare menus and share recipes based on readers’ needs and budgets
  • Braised Pork Hocks Wrapped in Bamboo Leaves (oh yeah)
  • The feature on the M Café Jazz Brunch – Something that I have been wanting to try!

Ok, enough tooting! But do support a local food magazine today! :)

Lasang Pinoy 18: Ampalaya with Egg

title
Another round of Lasang Pinoy is upon me and this time it’s all about vegetables. Lasang Pinoy, literally translated as Filipino Taste, is a food blogging event that celebrates all aspects of Filipino food (and the various permutations thereof…and believe you me, there are many).

This month’s host, Toni of Wifely Steps, has aptly named this round “Oh my gulay!” Gulay means vegetable, and “Oh my gulay!” is, as Toni put it, a Filipino “expression commonly used to present a feeling of shock, frustration, excitement, or surprise”. That’s right, just like “Oh my god!” or “Oh my gosh!” or “Oh my goodness!” I have no idea how the phrase originated, not that I haven’t used it, but I think we basically just took the “g” from god/gosh/goodness and turned it in to gulay. Strange? I think not! See here. Slang is part of culture and a fun part at that. Especially if it involves veggies…which are always nice.

Ok, not always. I love veggies, but there are a few that insist on scaring me off. So, although there are loads of veggie dishes I would like to make for this event, I decided to make one that I don’t (like, that is). The mighty ampalaya (bitter melon). I have tried more than once to like this vegetable…but it’s just too bitter for me. I was discussing a certain Jeffrey Steingarten train of thought with a good friend and I thought, “This can’t go on!”. It irks me to think of this brilliant green, wrinkly veg, sitting high and mighty on its throne, looking down at me and laughing, “You can’t eat me!”. Really? We’ll just have to see about that.

Ampalaya also happens to be one of C’s favorites! He was forced to eat it as a kid, and eventually grew to love it. Amazing huh? We never have it at home though because I don’t eat it, and I have this weird handicap of not being able to cook anything I don’t like. But the buck stops here.

I chose this preparation because it’s a typically Pinoy way of having ampalaya, it’s easy, and C likes it this way best (we may as well favor the one that actually likes ampalaya right?). I had no idea what I was doing. I sort of pieced together this dish from snippets and tips taken from other blogs, my mom’s cook, and C’s persistent yet anxious directives.

title
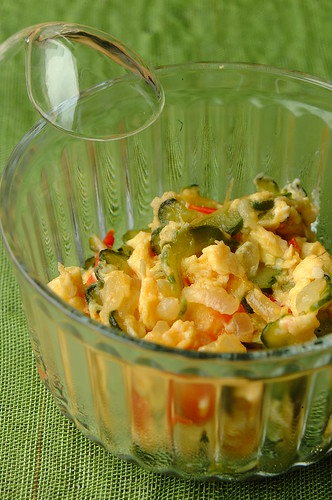
Ampalaya With Egg
  • 150-200 grams worth of ampalaya (bitter melon)
  • 3 heaping tablespoons rock salt
  • 1-2 tablespoons vegetable oil
  • 3 cloves garlic, finely chopped
  • 1 white onion, chopped
  • 1 tomato, seeds removed and chopped
  • 2 eggs, lightly beaten
  • Salt and pepper

- Slice the ampalaya in half lengthwise and scoop out the seeds and white innards. Slice each half widthwise into thin half moons.
- In a colander, rub the slices with rock salt. Rub them well! This part is fun…both you and the ampalaya get a salt scrub. When done, rinse ampalaya slices with water and let drain.
- Now, grab a handful of the drained ampalaya slices and SQUEEZE like your life depends on it. - Once you’ve squeezed the liquid out, set ampalaya slices on a paper towel and repeat with the next fistful until you are done with all the ampalaya.
- Heat the oil in a kawali (wok). Add the garlic, onions, and tomato all at once, and sautee until onions are soft and translucent.
- Toss in the ampalaya and stir fry until ampalaya is cooked through and tender.
- Take the pan off the heat and stir in the eggs. If, after some stirring, it’s still too runny for your taste, place pan back on the hob and continue stirring until eggs are set to your liking.
- Season with salt and pepper, then transfer immediately to a plate (or else the heat from the pan will continue to cook the eggs).
- Serves 2

I was nervous every step of the way. Not because the dish posed much difficulty, but because I could smell the ampalaya the whole time. Even if in all likelihood this was purely in my mind, the smell (which isn’t even that strong mind you) seemed to carry with it a bitter (no pun intended) taunt that I would not be able to do it. But I was patient and gentle (except for the squeezing part), and when the eggs softly set to my liking, I sprinkled some salt on it and took my first bite.

I’m cured!

Something I had done had mellowed all but a hint of the bitterness (the salt scrub? the squeezing?). The garlic, onions, and tomato added their own distinct flavors, making the dish as a whole taste less of ampalaya and more a happy combination of all the ingredients. And the egg enveloped everything in its creamy softness. I actually kinda liked it! As I greedily shoveled spoonfuls of that something-once-disliked into my mouth, the epiphany of it was amazing. A very “oh my gulay!” moment…

As for C, he was very happy that ampalaya is finally part of our menu. The eggs were a tad to wet for his taste (but that's how I like them! no matter, it's a snap to make separate batches...), but when I asked what else I could change he simply said: "Make more!"

In the end, neither I nor the mighty ampalaya were conquered. But I think we just may become friends :)

title

Hay Hay It's Donna Day #12: Potato Caesar

title

I know I am bordering on almost practically late, but before the deadline is totally upon me, let me quickly share my entry for this month’s Hay Hay it’s Donna Day.

What with all the mousses and cheesecakes we blissfully devoured during the last two rounds, it was time for something lighter…like a salad. A Caesar Salad to be exact, decreed our lovely host for HHDD #12, Katie of Other People’s Food. Not to be limited with just a traditional Caesar, Katie encouraged us to bring her anything with “the main elements of Caesar”.

And that is when all thoughts of “light” flew right out my window.

Behold, the Potato Caesar.

In one fell swoop I tossed everything that makes a Caesar salad what it is, and kept only the three most fattening: the dressing, the bacon, and the carbs (and why crouton when you can potato?). I love me :)

Potato Caesar

  • 1/2 the quantity of the dressing found here.
  • 400 grams marble potatoes
  • 5 strips bacon

- Clean the potatoes and place them in a saucepan where they are completely submerged in water. Boil until just tender, then drain and let cool completely.
- While the potatoes are boiling, make half the quantity of the dressing found here.
- Fry bacon until crispy, drain on paper towels, then crumble.
- Cut each potato in half, place in a bowl, and toss with the dressing and most of the crumbled bacon.
- Save a little of the bacon bits to sprinkle on top before serving.
- Serves 4-5 as a side.

This is a great way to vary a regular potato salad. Donna’s Caesar dressing was excellent! I whipped it up with my immersion blender and I licked everything clean (not the blade part…please do not attempt). I will definitely make it for a proper Caesar salad soon...and more than once. Perhaps even as a condiment for sandwiches. We had some of this with the burgers I made for Paul’s Big Burger Ballyhoo.

Mushroom & Caramelized Onion Burger

title
Save for my yen to have an herb and vegetable garden, I adore apartment living. I love how easy it is to maintain. I love the freedom of it, albeit this may all be in my head, but I feel it is so easy to just lock the one door and, whoosh, we’re off! I also enjoy that security is “built-in”, in the form of our friendly guards at the lobby (who help us with our leftovers to boot!). I like that I can run from my sauté pan to my computer in two seconds. And, this probably sounds very strange to some, I like having my neighbors close by (to understand this, you would need to understand what an absolute scaredy-cat I am), especially when one of them makes a really yummy fish roe spread.

One thing that we miss is grilling, outdoor, charcoal grilling to be exact. Open air barbecues…the smoky taste you get only from charcoal or wood…piling everything from juicy steaks to fresh veggies on a hot grill…a beer in one hand, heavy duty tongs in the other. I can slip into a sarong with a couple of cold beers on hand, while C wields the tongs, but a charcoal grill where we live now will still remain a dream.

Until we escape to mum-in-law’s egg farm for the weekend, we have to content ourselves with our trusty grill pan and contact grill – true friends of flat-bound grill lovers. Thanks to these two bits of genius we can enjoy grilled burgers and steaks and veggies (and anything else we can manage to trap between the plates of the all-powerful contact grill!). And I can enjoy joining events like Paul’s Big Burger Ballyhoo.

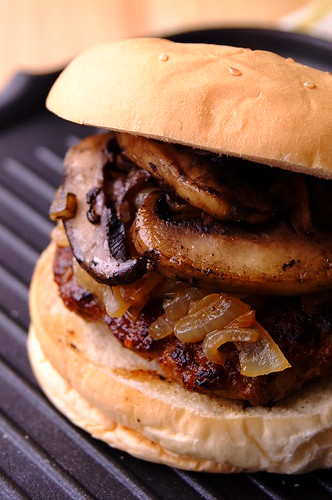
Mushroom & Caramelized Onion Burger

Burger patties as per this recipe (use the meatball recipe just shape as patties...I use the same recipe for my burgers and meatballs). Use 2-3 patties for this preparation and freeze the rest (or alternately, increase the topping below).

Topping good for 2-3 burgers:
  • 4 large button mushrooms, sliced
  • 5 small white onions, sliced
  • Sprig of fresh thyme
  • 2-3 teaspoons balsamic vinegar
  • Salt and pepper
  • Olive oil
  • Hamburger buns
    • - Sauté onions on low heat until golden and caramelized.
      - While that’s going on, sauté mushrooms, seasoning to taste with salt and pepper. Cook until just done, then set aside.
      - Toss thyme sprig in with the onions and continue cooking.
      - Make sure you patties and grill are ready.
      - When onions are soft and golden, add balsamic vinegar. Cook for 2-3 minutes more then set aside.
      - Grill the burger patties. Do not overcook!
      - Grill hamburger buns.
      - Place burger in bun, top with caramelized onions, then mushrooms.
      - The topping with be enough for 2-3 hamburgers. If you have more, serve it on the side.

      The combination of the thyme-scented onions and the mushrooms go so well with burgers I feel. I could be horribly biased though because I happen to love caramelized onions and mushrooms, so feel free to debate (C, for example, had the mushrooms on the side and used jalapeños instead).

      If you want turn this into the Ultimate mushroom & caramelized onion burger, spread some of your favorite barbecue sauce on the bottom bun-half, and melt some gorgonzola cheese on your burger patty before topping with the onions and mushrooms – the whole lot is eyes-rolling-backward-into-head good!

      back to school Paul’s Big Burger Ballyhoo is hosted by Paul, one half of the brilliant team that is Writing at the Kitchen Table. An interesting point – Paul will cook and sample all the entries! Go Paul!!! My hat’s off to you :)

      Next up: what we had with our burgers…happens to be an entry to yet another event…stay tuned!

      Crispy Sage and Brown Butter Pasta

      title
      Serves one. Why is it that I hardly ever see a recipe that “serves one”? I only really started cooking (and loving it) when I lived on my own, and more often than not, I was cooking to serve one. Aside from learning how to cook, I was also learning to reduce recipes to the smallest serving. I didn’t want to be eating the same thing for weeks (I discovered the hard way…with two weeks of beef kaldereta) so I trained myself to shop, market, prepare, and cook for one. I got really good at it.

      I never went to culinary school; I wasn’t learning to cook as a profession. I didn’t learn to cook growing up to feed a large family. I learned to cook because I was far away from home and I was hungry. My whole cooking experience, my love for food and everything about it, no matter where it is now, or where it will go in the future, started with just the one: One ravenous me. And I loved it…I reveled in it. Cooking for myself excited me…eating what I cooked excited me. I looked forward to dinner. I ate by candle light. It was a gastronomic love affair with myself. I cannot recommend this experience enough.

      This is why, no matter who I cook for now, or will cook for in the future, there will always be times when my hands will itch to “serve one” again, when I will want to cook something just for me. Culinary Me Time. This is also the perfect opportunity to make dishes that I have been wanting to try, but are not really C’s cup of tea. This pasta is one such dish.

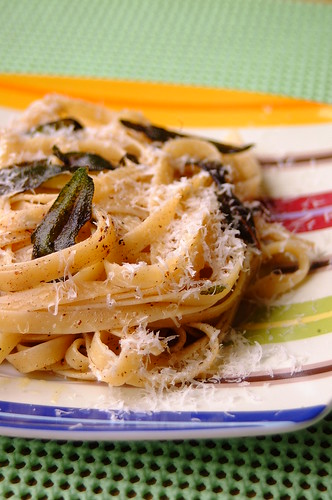
      Crispy Sage and Brown Butter Pasta
      (adapted from Donna Hay Magazine, issue #32)

      • 100 grams fettuccine or spaghetti noodles
      • 25 grams butter
      • Juice of ½ a lemon
      • 10-12 sage leaves
      • Salt and freshly cracked black pepper
      • Freshly grated parmesan cheese

      - Cook pasta as per package directions in a saucepan of generously salted water. Drain and set aside.
      - In a skillet, heat the butter until melted.
      - Add the sage to the butter and let this fry until the sage is crispy and butter is browned.
      - Stir in lemon juice, pasta, salt and pepper. Toss until combined and pasta is coated with the brown butter mixture.
      - Top with freshly grated parmesan to serve.
      - Serves one.

      This is a very simple dish relying on a few flavor elements – the nutty-ness of the browned butter, the heady aroma of the sage, both tempered by the tang of the lemon. I really enjoy these types of pasta dishes, but if you are one who loves more complicated sauces laden with ingredients, this may not be for you. C’s taste runs towards tomato based sauces so this isn’t for him either. It’s for me :)

      back to schoolThis is my entry for Weekend Herb Blogging, a fantastic event created by Kalyn of Kalyn’s Kitchen. This round is hosted by Ellie of Kitchen Wench. You can learn more about sage in the link above, or here.

      You may think this quite a strange post coming at the heels of my anniversary, but every marriage is sweeter when you’ve got quality “me/alone time”…and just because C is at work, doesn’t mean I have to eat leftovers! ;)

      Fathers and Daughters


      My father passed away at the end of April. It has been a tough adjustment but I have my good days and my bad days. I remind myself of his spirit and his passion for things in life. He was a pragmatic and interesting man who was very generous and giving to us. I will miss him terribly. Mostly, I miss the fact that he got me. That's hard to find. Someone who gets what you do and is supportive in a quiet yet unassuming way. I am greatful that I was able to spend some quality time with him during spring break just two weeks before his accident. Stop and spend quality time with family and friends. We sometimes forget to do that but it feels good when we do.

      Sadly, he will not see the book that I had dedicated to him but I know that he knew about it.I just received the manuscript for review and it will be coming out this fall for Martingale and Co. It is a scrapbook related book and I am excited about it. The book is geared more for beginners and I had great fun in putting it all together.

      I have yet another deadline in the next week. It seems as though that's all I talk about right?? It's tough because I work about a year ahead and I can't actually show you until it is published.

      I will put up a couple of free patterns soon though. I promise. It's all about having the time to do everything and priorities.


      Back from Boracay!


      I’m back! I’m still feeling the residual holiday languor though, so kindly pardon the slow posts. Our Boracay getaway was filled with sun (it was scorching!), sand, sea, delicious food, and wonderful company. Right now I’m in the middle of catching up at work (why is it so hard to get my worklegs back?) but I’ll leave you with my highlights for this trip…

      Hot sun, cool shakes – Boracay is famous for its shakes. Everything from “choco-vanilla-peanut-banana” (of which I was a big fan when I was younger) to simple fruit shakes. When the mercury rises there is nothing like an icy cold, fresh fruit shake – my favorite being ripe mango (heaven!). We also had watermelon, cantaloupe, and mango-strawberry. Mmmm…

      C’s Mexican fix – Mexican food is one of C’s favorites, and none of the Mexican restaurants in Manila excite him. Strangely enough, this little island is home to one of the better Mexican restaurants we have come across, Mañana. Listening to C try and sales-talk the manager into opening a branch in Manila was also part of the fun.


      New sunnies – I have this unhealthy obsession with cheap sunglasses (I always lose the expensive ones!), and in Boracay there are always hawkers going up and down the beach with racks of their wares. Buying new sunglasses is always a part of my trip.

      Discovering Discovery Shores – The newest resort on the strip…and the only hotel from the Philippines to be included in the Small Luxury Hotels of the World guide. No, we didn’t stay there…we just poked around, and tried to absorb the swanky-ness.

      Fried doughnuts for 3 pesos apiece – Move over Krispy Kreme and all the rest…my favorite doughnut has always been the cheapy kind that they fry up in a big kawali (wok) of hot oil, and then coat in regular white sugar. I have loved these dense and chewy local doughnuts since I was a kid, so you can imagine how pleased I was to see the little cart selling them…at 3 pesos each! Let’s see, that’s either .06 Usd or .04 Eur.


      “Room Service” – Our favorite “on-the-cheap” joint in the market, called Smoke, makes great value-for-money rice dishes, which also happen to be delicious, and they deliver. In the blazing heat of high noon, it was no small relief to have our Chili Chicken (I have sworn to replicate it!) delivered to our resort, to be wolfed down in bed.

      Doing nothing – Looking at each other and saying things like: “What do you want to do now?”, “Let’s take a nap!”, “Ok!” Aaah! The luxury of it!

      Our anniversary dinner – The best meal of the trip! All the more fantastic because we shopped for it ourselves. We headed out to the wet market in the morning and came away with a talakitok (trevally/jack), some clams, some prawns, and three lobsters. Also a bunch of eggplant (aubergine), native tomatoes, and red onions for a salad. The clams (halaan) were turned is to an incredibly tasty soup. The prawns were steamed, the talakitok grilled, and the lobster was served with garlic butter. We had steamed rice and all manners of sawsawan (dipping sauces): calamansi (calamodin), toyo (soy sauce), sinamak (vinegar with garlic, ginger, and chilis), sili labuyo (bird’s eye chili)…the works! The seafood was amazing…so fresh…but the lobster was the real star. This was definitely one of the best lobster meals I’ve had. The lobsters themselves look quite regular. But once cooked and cut in half we saw that it was literally bursting with meat. The soft white flesh was pushed flush against its shell like a film star’s bosom in a tight bodice. The meat was unbelievably sweet and tender and succulent. Even the resort staff (where we had our bounty prepared) approached us to ask where we got the lobster. This feast was eaten kamayan-style (with our hands), under one of the resorts beach huts. After the food was gone we went for a stroll on the beach to walk off (hopefully!) a bit of our overindulgences.


      Perfect beach weather - Unlike last year, the weather behaved beautifully. It was so sunny that the light turned the sand an almost blinding white and the sky a brilliant blue. The heat did make us more lethargic…but, hey, we were on vacation, so it’s ok to be a bit slow…to lag and tarry through scrumptious meals, outdoor naps, and cool dips in the ocean.

      The best highlight of course is having a partner-in-crime with whom to enjoy this all...Happy anniversary C! :)

      Same time last year...

      title
      One year. I know it’s been said, and sounds awfully trite, but it doesn’t seem like one year at all. It seems both much more and much less. Much more because my life before this seems so very far away. Much less because I feel like this first year, with all its adventures, sped past me no matter how hard I tried to pull the reins in a bit.

      So we are returning to the island where this all started…without the dress (although I do have a less bridal little number to take its place), without the guests, without the photographers. Just us and the beach…

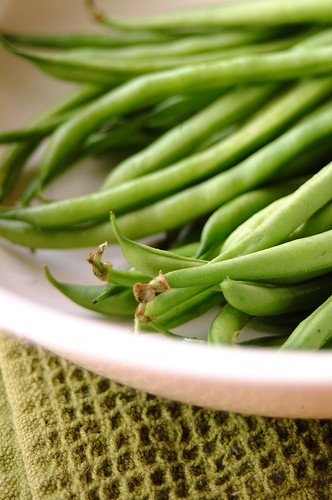
      Before I go, I leave you with (as promised) the first dish I tried from Chocolate & Zucchini. I was drawn to this dish as it showcased only a few flavors, letting each shine and complement the other. I had also come across some French beans in the market that were calling my name!

      title
      This isn’t Clotilde’s exact recipe as I reduced it to feed only two (something I usually have to do with most recipes). I also didn’t have any parsley (the original does and I’ll be sure to add it in next time). I didn’t have any pecans either, so I substituted walnuts (which Clotilde indicates is a fine substitution).

      French Bean Salad with Walnuts and Dry-Cured Ham
      (adapted from Salade de Haricots Verts, Noix de Pécan, & Jambon Cru, from Chocolate & Zucchini by Clotilde Dusoulier)
      • 150 grams French beans, trimmed
      • 2 teaspoons extra virgin olive oil
      • 1 teaspoon cider vinegar
      • Fine sea salt and freshly ground pepper
      • 2 thin slices jamon Serrano, shredded (Clotilde uses jambon d’Ardèche, but other dry cured ham, like prosciutto or Parma, will work as well)
      • 1/8 cup walnuts, toasted and roughly chopped

      - Steam the beans for 8-10 minutes, until just cooked through and still crisp. Plunge in cold water (to stop cooking) and drain.
      - In a salad bowl whisk the oil and vinegar together. Add salt and pepper (remember that you will be adding ham later, which is also salty, so don’t overdo it).
      - Add beans (and parsley if you are using it) and toss gently to coat with dressing. Adjust seasoning.
      - Arrange ham and nuts over the beans.
      - Serves 2 as a side dish.

      title
      You may serve this immediately or refrigerate for a day, just remove it from the fridge half an hour before eating. I was rushing around so I removed it only right before we were going to eat, so we had it chilled. In this heat it was actually perfect that way. Cool and crisp and refreshing. This salad is so easy to whip up, but its taste is much more luxurious then its simplicity belies. The fresh crunch of the beans with the zing of the dressing just barely clinging to it, the earthy walnuts, and the silky-salty rich jamon…the combination is delicious!

      I’m off to get ready and pack…see you all when I get back! :)

      limited edition prints


      Published by
      Child at Heart Art Gallery
      in historic downtown Newburyport, MA ...
      I'm selling limited edition prints!!
      The art is bordered by Terry Webb Harshman's poem, "STARS."
      The 13 X 19 giclee's are printed on Arches Infinity Smooth paper. Each print is numbered, signed, and comes with a certificate of authenticity.
      Please contact me if you are interested in a print!

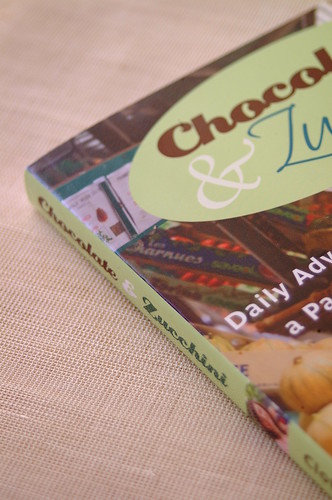
      Chocolate & Zucchini - The book!

      title

      Do you read Chocolate & Zucchini?”, came an instant message on my laptop screen. It was a friend from my favorite bookshop. “Yes! Of course!”, was my enthusiastic reply. Before her next message came I already knew. Clotilde’s book…they were going to order it.

      Chocolate & Zucchini was one of the two food blogs I first started reading (this is the other one). To a great part, C&Z is one of the reasons I was inspired to dip my toes into, what was for me then, the very unchartered territory of food blogging. It also, more importantly, inspired me in countless ways here in my own kitchen. Clotilde’s site was, and remains to be, a little piece of Paris that I can visit whenever I want.

      I am one of her many (many!) readers who heartily cheered when Broadway Books decided to publish her, and then eagerly awaited the book’s arrival. However, truth be told, in the back of my head, I was worried that her book might not reach my shores. I was ready to order it online if it came to that.

      But happy day! The bookshop decided to order it (I gave them a glowing tribute!) and now I have my own copy of the Chocolate & Zucchini cookbook! Hooray! Like Clotilde says in the foreword:

      “…I find that a book – the object itself, the weight in your hands, the presence on your bedside table – has a personality and charm that a Web site can never hope to achieve.”

      I agree. I love to snuggle up with my books, dragging them into bed, their physical presence a great comfort to me. Now I have a tangible piece of C&Z to call my own. I am still going through it and, if you are a fan of Clotilde’s, it does not disappoint. The recipes are prefaced with delightful snippets in Clotilde’s unmistakable lilt. The recipes themselves are pure C&Z, unfussy celebrations of delicious flavors. There are simple dishes that really let the ingredients’ characters shine, as well as more involved recipes that crank up the impressive factor. I haven’t finished reading it, and already there are many dishes getting bookmarked. One I have already tried and will be posting soon. There are also sections on Clotilde’s cooking philosophy, stocking your pantry, and entertaining. I am very pleased with my purchase, and it presently sits on my night table where I have been perusing it every night.

      When I bought this, there were only three copies left, as it was part of a small batch that arrived before the actual shipment. Don’t worry! The next batch is being air freighted as I type. If you want to reserve a copy call Fully Booked at 7565001 to 04.

      Lasang Pinoy 17: Tortang Talong

      title
      After a lengthy hiatus, Lasang Pinoy, the Filipino food blogging event is back! Lasang Pinoy, meaning Filipino (pinoy is slang for Filipino) taste, focuses on Filipino dishes revolving around a certain theme chosen each month. I make it a point to participate because: 1. I am a Filipino (ok, that was obvious), and 2. I feel I am sadly (embarrassingly) lacking in Filipino food knowledge and cooking skills. So I use this event to really think about the local foods I like, and then go about the fun of learning how to make them.

      This month’s round is hosted by Eat Matters and the theme is eggs. I’ve already mentioned that the humble egg is much beloved by me, so I was particularly excited to come up with something for this round. Try as I might though, I was coming up blank. Aside from all the different silogs (rice meals with a meat/fish and egg usually served for breakfast), I couldn’t think up of a single Filipino egg dish. Shame on me!

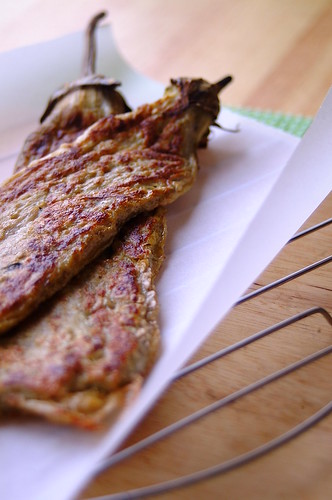
      When I stopped thinking of an “egg dish” and started thinking if a “dish using egg” it came to me – tortang talong (eggplant/aubergine omelet)! Strange that I hadn’t thought of it sooner…it is one of my favorites. I make it here exactly the way I like it: no meat and just a thin coating of egg crisping golden brown all over.

      Tortang Talong…the way I like it
      • 2 Filipino eggplants (or other Asian eggplants…or any eggplant that is long and thin)
      • 1 egg, beaten
      • Vegetable oil
      • Sea salt

      - Roast and peel the eggplants. This is most commonly done over the flame on the hob until black and kind of charred, after which it is fairly easy to remove the skin. However, I like to do it under a hot grill/broiler in the oven just because I find it easier. Leave the stems on.
      - After peeling, lay the eggplant in a colander and flatten gently with a fork, being careful not to break it.
      - Beat your egg in a flattish bowl and then lay your eggplants in, turning to coat evenly.
      - Heat the oil in a skillet. Once hot, gently place the eggplants in the pan. Leave to sizzle until golden brown and season with salt. Flip to brown other side. (since you have left the stems on you can do this whole operation without a spatula or flipper…just use the stem to move the eggplant around).
      - Drain on paper towels when done. Serves two.

      This can be served hot or at room temperature. I prefer it straight from the pan with some cold ketchup. I don't normally take a lot of ketchup (I like my fries with mayonnaise), but this is the one thing I must have with it. We had this with some adobo fried rice (a fantastic way to use leftover adobo), but I’m sure it would make a perfectly good light meal on its own. You can also slice it up to top a salad. Next I want to try it in pan de sal, with some thinly slice tomatoes, onions, and kesong puti (local fresh white cheese), then stick the lot in a contact grill for some native paninis.

      Welcome back Lasang Pinoy and thanks Eat Matters for hosting!

      I'm a Table Guest at Table for Three!

      I'm always on the lookout for new local blogs...particularly if they feature interesting restaurants about town. Although I love discovering new places to eat at, I am only one girl in this big bad city, so it helps to have other like-minded palates hunting down culinary hotspots, checking out the food, and giving us all the 411.

      Table for Three, Please does this three times over...meaning their three members go to the same restaurant, so readers get three different reviews. They also interview local chefs and restaurateurs. And once in a while have bloggers over to visit. I am so tickled to be asked to guest blog (for the first time ever!) at their site. So if you have a spot of time, and would like to find out whose tables I dream of gracing, head on over there :)

      A Taste of Yellow: Huevos Estrellados

      title

      I have always been a big admirer of Barbara’s. Not only is she a great cook who shares her delicious recipes on her fabulous blog, Winos and Foodies, she is also the creator of Hay Hay It’s Donna Day, one of my favorite blogging events. She takes the time to organize events, answer all our comments, and post pictures of her beautiful New Zealand (a place I am now longing to explore). All this while fighting cancer. The strength and aplomb with which she approaches everything is remarkable. So when she put out a call to food bloggers everywhere to participate in A Taste of Yellow, a blogging event to raise cancer awareness, I definitely was not going to miss it.

      A Taste of Yellow is an event to support LIVESTRONG Day:

      LIVESTRONG Day is the Lance Armstrong Foundation's (LAF) grassroots advocacy initiative to unify people affected by cancer and to raise awareness about cancer survivorship issues on a national level and in local communities across the country. LIVESTRONG Day 2007 will occur on Wednesday, May 16.

      Cancer touches everyone’s life, whether it be our own, or that of friends and family. I have had family members fight this terrible disease…some triumphant, and some not. Three days ago we lost an uncle to cancer. I myself have experienced the fear that comes with discovering a lump in your breast. I thank God and all my lucky stars that it was nothing serious, but because of this I have been having mammograms and sonograms (to monitor) since before I was 30.

      My mother (a very wise woman) always says: “Knowledge is power…don’t be scared to find out…learn…own it!” And I suppose this is what awareness is all about. Not being scared in the darkness of ignorance, but fearless in the light of knowledge.

      And so A Taste of Yellow…the color of sunshine and light! We can make anything we want as long as it features a yellow food and I have decided to make a very simple dish containing one of my favorite yellow foods around…eggs.

      Huevos Estrellados (or more commonly known as Huevos Rotos) is a very down-to-earth, homey kind of dish. It’s basically “broken” eggs with potatoes. You can vary it in countless ways by adding mushrooms, onions, garlic, chorizo, roasted peppers, or whatever you can think up. I kept it plain and yellow here.

      title
      Huevos Estrellados
      (adapted from my cousin’s recipe)

      • 2 medium potatoes, peeled and cut into chunks
      • 3 eggs, separated
      • Salt
      • Olive oil

      - In a pan, heat oil slightly and add potatoes. Cook over very low heat. You don’t want to sear them just yet. You want to slow cook them in the olive oil until they are soft, and then wait until the edges get golden and crisp. Don’t rush this. It’s worth it.
      - Once your potatoes are soft and golden, with edges that are as crisp as you want them, pour in - egg whites and stir for 3-5 seconds.
      - Turn off the heat and stir in yolks until done to your liking. Season with salt and transfer to a plate (or the heat from the pan will keep cooking the eggs) and eat immediately.

      We ate this for brunch with English bangers and local longganisa. Delicious and satisfying!

      Make sure to check back at Barbara’s for the round up on May 16!


      back to school

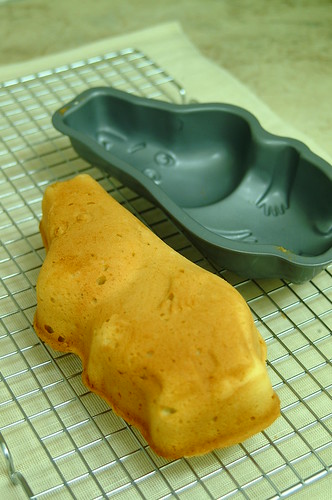
      Moomin Cake

      title

      I’m taking a break from Greece and heading up north where the weather is cooler. Taking a mental trip to Finland where I can hang out with the Moomins and eat berries all day in their enchanting valley, where I am sure it gets nowhere near as hot as here.

      Finland was my first asignment working away from home…and it was as far from home as I could get. Whereas my home city is crowded and hot, Helsinki was cool (ok, cold too!) with easily half the amount of people (in truth, the population of Finland is less than half the population on the city I live in). The air seemed so clean that I feared it might burn an icy path down my lungs (which were accustomed to somewhat "tougher" air). Everything was so different. Different from home, and even different from the other places in Europe I had visited in the past. This was the first time I step foot in Scandinavia…and I was captivated.

      I think it was these very differences that quietly drew me in. I enjoyed the vastness of my new personal space, so different from what I was used to. I could walk and think, and never be disturbed. I reveled in the crystal cleanliness this place. They say you can still drink from the lakes! Is that true? The markets were filled with berries and mushrooms and salmon, and I couldn’t get enough. I was charmed by the shy smiles of the Finns…ready to give a straightforward answer but never one to hit you over your head with their opinions. Perhaps it was the only the infatuated eyes of this naive foreigner, but to me Finland sparkled like so many diamonds in the snow.

      And Santa lives there…what more could one place need?

      Moomins.

      Moomins are the creation of Finnish writer and illustrator Tove Jansson. The tales chronicle the adventures of a family of little Scandinavian trolls, white and rotund and furry, in Moominvalley and beyond. Primarily children’s books, they are brilliantly written, running the gamut from whimsical adventures to serious reflections on family and life (at least in adulthood retrospect). And they are just this side of absolute cute-ness. I have been a big fan since I discovered these little creatures.

      The cake tin belongs to a good friend whose baby shower we held at my flat. She lent it to me to bake our Moomin cake for the shower (as you can see, Moomin has got more than one fan in this country). It was a gift from a friend of hers who lives in Finland. Isn’t it just the most adorable thing you have ever seen? Ok, he’s got a bit of holes in him (my fault) and his features are not too distinct, but I was seriously enamored!

      (In case you are wondering, I used the Classic Pound Cake recipe from Martha Stewart’s Baking Handbook.)

      (Perhaps this is the reason I love Tessa Kiros’ cookbook, Falling Cloudberries, so much. Because she has stayed in, and written about, both Finland and Greece, two countries close to my heart…and my stomach.)

      (If you live in Manila, and you want to read more about the Moomins, their books are available in the children's section of Fully Booked bookstore.)